Thursday 31 January 2013

Vanilla Pound Cake

Yes, you are right.
Yet another post about cake.
I baked way too many cakes this past month.
The problem is not really with baking them.
It is with eating them.

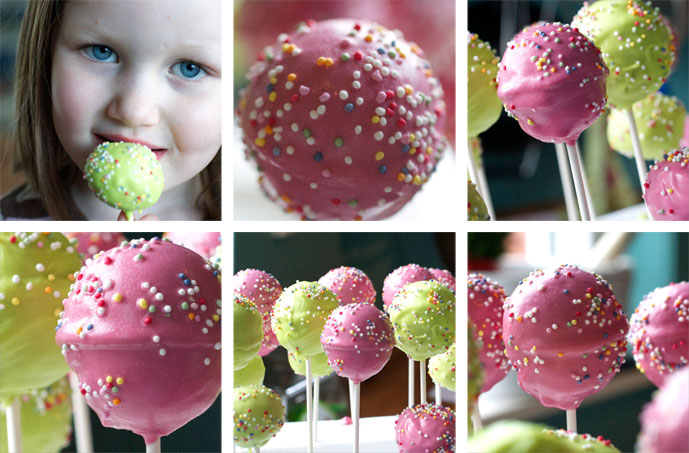
In search of cake ideas for Heidi's fairy themed party, I found a pound cake recipe by Donna Hay. It was in her annual kids issue which I downloaded and read via Zinio. The same one with the fairy party ideas.

It is a very basic recipe and that is why it appealed to me. Of course I modified it slightly by adding pink food colouring to the batter and decorating it with buttercream icing.

The cake itself is quite dense but that is exactly what I expect from a pound cake.
Delicious!


Here is the Donna Hay recipe:

250g butter, softened
250g caster sugar (superfine)
1tsp vanilla extract
4 eggs
250g plain (all purpose) flour, sifted
60ml milk

Preheat oven to 160 degrees Celsius.
Place butter, sugar and vanilla in an electric mixer and beat for 8 - 10 minutes until pale and fluffy.
Add the eggs, one at a time, beating well after each addition.
Add the flour and beat well to combine.
Fold through the milk and spoon into a lightly greased 20cm round cake tin lined with non-stick baking powder (which I forgot to do but luckily the tin was grease enough so it came out easily).
Bake for 55 - 60 minutes or until cooked when tested with a skewer (I ended up adding 10 minutes to the baking time...). Allow to cool.

Decorate as you like!
I used butter cream icing on my cake :-)


Tuesday 29 January 2013

Butterfly Treats

In the Netherlands it is a tradition for children to give a treat at school when celebrating a birthday. Nothing too big or too fancy, and the school prefers 'healthy' treats if possible.
Right, like that's going to happen.

I found a good compromise in these little butterfly treats.
Marshmallows and grapes.
Easy to put together and something that my daughter could get involved in.


I found the idea on this site.

Here is my step by step guide:


Monday 28 January 2013

A Lovely Gift

Yesterday we had friends over for lunch.
Sunday morning spent in the kitchen cooking up a storm. 
My kind of Sunday.
It was great to catch up while the kids played and made a mess.
Catherine is very creative and has been experimenting with fabric.
She brought me a gift and made my day!


It belongs in a white frame and will get a place in my kitchen soon.
I'm waiting for her to open an Etsy shop because I love all her creations!

Have a great week everyone :-)


Friday 25 January 2013

DWZI - Winter

It was a cold week...
It was also a busy week at work.
Learning new processes and figuring out what is expected of me.

This morning I dropped the kids off at a babysitter and drove straight to the spa.
There I spent four glorious hours of me time.
Highly recommended.

This was the view on my way to the Spa Sereen:


Hope you have good weekend ahead!

You can find all the DWZI participants here.


Thursday 24 January 2013

Cupcakes for a Fairy Party

Yes, I really went all out in terms of baking this past month.
These cupcakes by Donna Hay were lovely.
I ate two of them myself and wanted more...


I found the recipe in the Donna Hay annual kids magazine. She had a whole spread for a fairy party which I found very inspiring.


Here is a copy of the recipe. Definitely worth making again!

Cupcake Ingredients (makes 12):
125g butter, softened
165g caster sugar (superfine)
1tsp vanilla extract
2 eggs
185g plain (all purpose) flour, sifted
1tsp baking powder, sifted
125ml milk
1 x 500g store bought ready to roll fondant icing
pink food colouring

Vanilla Butter Icing:
125g butter
160g icing, sifted
1tsp vanilla extract

Method:
Preheat oven to 160 degrees Celsius.
Place butter, sugar and vanilla in an electric mixer and beat for 8 - 10 min until pale and creamy.
Gradually add the eggs, beating well after each addition until combined.
Add the flour, baking powder and milk and beat until just combined.
Spoon mixture into a muffin tray lined with paper cases and bake for 20 - 25 min (I baked it for about 30 minutes in the end).
Allow to cool.

To make the vanilla icing, place the butter in an electric mixer and beat for 5 minutes until pale and creamy. Add the icing sugar and vanilla and beat for another 10 - 15 min until pale and creamy.
Spread the icing on the cupcakes.

Divide the fondant into two equal portions.
Add a few drops food colouring to the one portion and knead until the colour is even and the icing smooth.

Roll the fondant out between two sheets of baking paper until about 2mm thickness. Cut about 12 x 7 cm rounds to cover the cupcakes, Cut little 1cm rounds to place on top of the big rounds.


Tuesday 22 January 2013

Orange Chicken

I had chicken breasts, fennel, onions, mushrooms and some oranges.
What to make, what to make.
Luckily the Internet is full of ideas. 
I love the Internet.

I stumbled across a recipe that matched my ingredients on this website. It turned out to be rather good and very easy (bonus!). It calls for 'herbs de provence' which of course I did not have lying around but that did not stop me from just adding whatever I felt like in terms of herbs and spices. 
Long live improvisation!


Here is a link to the original recipe.

Here is my improvised version.

Ingredients:
4 skinless, boneless chicken breasts
1 tablespoon butter
1 onion, peeled and sliced thinly
1 cup mushrooms, sliced
1 bulb of fennel (top, bottom and outer leaves removed), sliced thinly
1 tablespoons olive oil
1 teaspoons herbs (coriander seeds, basil, cayenne pepper, etc.)
salt and pepper
Juice of 2 oranges
Method:
Melt the butter in a deep skillet on medium heat. Add the chicken breasts and cook, turning occasionally, until browned and just cooked through (about 15 minutes, but depends on the thickness of the poultry).
Meanwhile prepare the mushrooms, fennel and onion.
Remove the chicken from the pan and add the olive oil, heating it for about 1 minute. Add the sliced onions, mushrooms, and fennel. Cook on medium heat, stirring occasionally, for 15 minutes.
Return the chicken to the skillet with the vegetables, then sprinkle with the herbs, and salt and pepper. Pour the orange juice on top and adjust the heat so that the liquid is just barely bubbling.
Simmer for 10 minutes and season to taste with salt and pepper. Serve on top of rice.


Monday 21 January 2013

Weekly Menu

Snow.
Apparently snow is on the weather menu this week.
It causes lots of traffic and train delays.
Sigh.

As for our menu... well it is a vegetarian week.

Wraps with tofu.
Vegetarian pasta.
Vegetable soup.
Vegetarian burgers.

Here's wishing you a warm week ahead!


Friday 18 January 2013

DWZI - Fairies

The fairy party went really well.
At least from what I could tell all the little girls had a great time!
Most importantly Heidi felt like a princess.
I wonder what the theme is going to be next year...


Have a happy weekend everyone!

You can find all the DWZI participants here.

Thursday 17 January 2013

Cake Pops Success!

Been there, done that ;-)


As you saw on Tuesday, it was not exactly easy but in the end I'm pretty happy with how my cake pops turned out.

I actually made 2 different types, you know, just to experiment.

  • Cake pops - the very quick and easy way
  • Cake pops - the old fashioned, baked in an oven with a cake pop baking tray, way

Both ways work just fine but my favourite is the cake pops that I baked myself. It is lighter and not quite as sweet.

You should watch this video by Bakerella, the inventor of cake pops. It is very helpful and will show you how to make cake pops by crumbling up a cake and mixing it with butter cream icing. This is the very quick and easy way.

In the end it is all about finding a rhythm and being very patient (easier said than done!).


Tuesday 15 January 2013

Cake Pop Nightmare

Well, probably not exactly a nightmare... more like a challenge.
But don't fear, it all worked out in the end.
First I'm going to tell you what not to do.

1. Forget to grease the baking tin

No you didn't! Yes, I did.
The 'cake pop mix' from Jumbo was completely wasted. Not even one little cake pop came out of my fancy cake pop tin from the Hema. None. They all were ripped apart when I opened up the tin. Lesson learnt - grease the tin!


2. Overheat the candy melts

You didn't know it was possible, did you? Well apparently even one minute too long in the microwave can make the candy melts become rock solid instead of perfectly smooth.
Luckily I bought more than one bag of candy melts, I suggest you do too.


3. Use a shallow bowl for dipping

If you cannot submerge the whole cake pop in one go then your bowl is not deep enough.
Want to know what happens when it is not deep enough?
You end up moving the cake pop around, of course, trying to cover it.
It shouldn't be a surprise when the cake pop dislodges from the stick and stays behind in the candy melts. It should't be, yet I was pretty surprised.
Use a deep bowl, just do it.


4. Drip, drip, drip

Make sure you get rid of the excess covering (candy melts or melted chocolate) from your dipped cake pop. This means holding it over the bowl and slowly let it drip down while slightly tapping it. It will take some time but don't worry, somehow the melted chocolate will stay melted. Initially I was so worried that the chocolate in the bowl was going to harden within minutes that I did not take enough time to get rid of the excess chocolate from the cake pops. Besides it dripping all over the styrofoam, it will also form icicle looking spears which might be exactly what you want (not me though).
Be patient.


Like just about everything in life, practise makes perfect and in the end I was pretty happy with the results.

Stay tuned for the successful cake pops post on Thursday!

Monday 14 January 2013

Weekly Menu

I have absolutely no idea what to serve for dinner this week.

All the cake I baked this weekend is impairing my ability to think.

Drastic measures are needed.

HELP!


Friday 11 January 2013

DWZI - Cake!

It's been non-stop celebrations in my house.
Stella turned two and Heidi turned 5 all in the span of two weeks.
I've been baking a lot.
For Stella I made cake pops.
For Heidi I made a 'Hello Kitty' cake.
On Monday evening I made cute little butterfly 'traktaties' aka treats for Heidi's school which did not require any baking. And today I am about to embark on baking cupcakes and a good old fashioned poundcake - all to be decorated in the fairy theme for Heidi's party tomorrow.

One of the moms at Heidi's school was positively shocked yesterday when I told her I'm baking everything for the party. Let's be clear, there will only be six little girls so it is not like I'm baking for that many people ;-)


Here's wishing you all a wonderful cake filled weekend!

You can find all the DWZI participants here.

Thursday 10 January 2013

Hearty Pasta with Brussels Sprouts, Cheese and Potatoes

Nigella is fabulous.
I always find inspiration from her to make delicious things.
On new years eve I made her hearty pasta dish.
Well, it was almost the same as hers except without using her exact ingredients. Not because I did not try to find them... but simply because the grocery store did not have them in stock. It was very busy that day and after going to three, I kid you not, three stores in search of ricotta cheese I simply gave up and improvised.
It was delicious and I have witnesses!
I have a feeling that this will become one of my 'go-to' dishes.


Here is the link to Nigella's recipe.
Here is my improvised ingredient version:

Ingredients

500 gram brussels sprouts (trimmed and halved)
200 gram baking potatoes (peeled and in 2-3cm dice)
500 gram penne
1 pinch of salt (for vegetable and pasta water, to taste)
125 ml creme fraiche
200 gram really, really, really old cheese (grated)
50 gram unsalted butter (soft)
1 tablespoon garlic oil (one clove of minced garlic in olive oil)
4 sage leaves (shredded)
100 gram grated parmesan

Method

Preheat the oven to 200°C, and fill a large pot with water to cook the sprouts, potato and pasta.
When the water boils, salt it generously, tip in the prepared sprouts, the potato dice and the pasta and let the water come back to the boil, then cook for about 8–10 minutes, or until the potato is tender and the pasta al dente. Just before draining, remove 2 cupfuls of the cooking liquid and put to one side.
Tip the drained pasta, sprouts and potato pieces into a roasting tin (approx. 25 x 36cm), or a lasagne dish (approx. 23 x 34cm), then add the creme fraiche and grated really, really, really old cheese and a cupful of cooking water, and toss well to combine. Add more liquid if you feel the pasta is too dry.
Warm the butter and garlic oil in a small saucepan and, when melted and beginning to sizzle gently, add the shredded sage and fry for about 30 seconds before spooning or dribbling the butter and crisp sage over the pasta bake. Sprinkle with the Parmesan and bake in the oven for 20 minutes, by which time the surface will be scorched a light gold. Let it rest for at least 15 minutes before eating.

Tuesday 8 January 2013

Pork Roast

Walking around Albert Heijn just before Christmas is looking for trouble.
Especially if you feel like browsing and everyone else seems to be in the amazing race, dashing around like maniacs.

I survived and walked out of the store with a pork roast a.k.a. varkensrollade.
Here is a link to the AH Allerhande magazine where I found inspiration on how to cook it. You know me though, I looked at a few recipes and then improvised.
I basted it with a honey mustard and olive oil mixture and roasted it in the oven for about an hour. It was pretty good :-)


Monday 7 January 2013

Weekly Menu

After the cake and sweet treats which we had yesterday to celebrate Heidi's birthday I feel like we have to try and eat lots of vegetables this week.


Vegetable soup, vegetarian pitas, beef in tomato stew with rice and of course pasta.
I'm having some friends over for dinner on Thursday evening and I plan on making a delicious lasagne with a big salad.


On Friday I'll be making cake pops and a big cake for Heidi's fairy princess birthday party which will take place on Saturday. 

Wish me luck!


Friday 4 January 2013

DWZI - Welcome 2013!

This week I saw an old year transition into a new year.
Pretty cool how that happens.
In the Netherlands it is accompanied by lots and lots of fireworks. 
(and I really I mean a HUGE amount of fireworks)

Unfortunately I did not see that much of it because Stella got scared and I took her indoors where she promptly fell asleep on my lap. I am a little disappointed that I did not manage to take even one photo of the fireworks, but hey, there is always next year!

This morning Stella decided that it is best to wake up at 4:30 am. 
I am not sure why.
I am not exactly happy about it.
I am glad though that it is Friday.

This past weekend I started a cake pop experiment which I will be repeating next week as a treat for Heidi's birthday. She's turning 5 on Sunday. Yes, lots of baking is on my agenda!


Have a great weekend everyone!!
You can find all the DWZI participants here.


Thursday 3 January 2013

Butterfly Cookies

I bought a magazine called Taarten Decoreren for €1,50 which had some lovely cake & cookie recipes, butterfly cookie cutters and even a cardboard cake stand. Bargain!

I've never actually tried making royal icing before and you know what, it is not that hard.
Given that it was my first attempt I will admit that the cookies were not perfect. Plus I had to double everything and that always adds a level of complexity...
It was Heidi's turn to treat at the class 'theekransje' a.k.a tea party before the christmas holidays.
Luckily the group of 4 and 5 year old kids that ate them were impressed.

I made them very late at night and the photo's I took were terrible... but you get the idea. I made soft pink and baby blue butterflies with light green centres.

It is Heidi's birthday in January and I'm very tempted to try them again!


Digital frame graphic from Maybemej.

Here is a link to the magazine website.

Here is copy of the recipe from the first edition of the magazine just in case I lose the paper based one:


Basic Sugar Cookie Recipe (yields 18 - 20 cookies)

Ingredients:
125 gr butter
125 gr caster sugar
1 medium sized egg
1 tsp vanilla extract
250 gr flour

Beat the sugar and butter well, mix in the egg and the vanilla extract, sift the flour into the mixture bit by bit until it is mixed well and a dough has formed, knead until soft.
Wrap the dough in glad wrap and let it cool in the fridge for about 30 minutes.
Preheat the oven to 180 degrees Celsius.
Roll out the dough until about 4mm thick and cut out butterfly shaped cookies.
Place the cookies on a sheet covered with baking paper and bake in the oven for about 10 - 15 minutes until golden. Let them cool down completely before decorating.

Royal Icing
Ingredients:
500 gr icing sugar
2 medium sized egg whites
1 tablespoon lemon juice

Sieve the icing sugar into a mixing bowl. Now add the egg whites and the lemon juice and beat the mixture well. Beat it for about 6 - 7 minutes with a hand mixer or 5 minutes in your kitchen machine on low speed.
The mixture should have a nice shine to it. If you think it is too dry then add a little lemon juice and beat for a few more minutes. It should be quite a thick mixture with stiff peaks (you can always thin it later!). Now place it in an airtight container with a damp cloth over the icing, close lid well to ensure it does not dry out. It should keep up to 5 days in the fridge - remember to beat it before use.

I will not attempt to tell you how to do the piping... but if you got this far then I think you'll figure it out. First pipe an outline and then thin the icing so that it becomes more runny so that you can fill in the remainder of the surface.

Practise makes perfect!


Related Posts Plugin for WordPress, Blogger...